TL;DR – I’ve been asked a lot lately about how Privileged Access Groups (Preview) work, which got me the idea to write a blog about it.
I’m not going to describe the difference between Privileged Access groups and role-assignable groups as there is plenty of information about the difference here: What’s the difference between Privileged Access groups and role-assignable groups? – Entra ID (f.k.a Azure AD) | Microsoft Docs.
I’m going to show you how you can utilize Privileged Access Groups and make them eligible for your users or members of a group of users.
But to give you a brief overview of what a Privileged Access Group is. Privileged Access Group is a group that you can use to gather multiple higher privileges together like several Entra ID (f.k.a Azure AD) Roles and Azure Resource permissions and then give a security group or individual users access to elevate to this Privileged Access Group and therefor get multiple permissions for limited time instead of managing individual Entra ID (f.k.a Azure AD) Roles and/or Azure Resource eligible assignment permissions for each user or group, in addition to easier management you could then create two groups with same permissions, and then have different settings for different security groups / individual users for example a separate security group that has External Consultants / Guest Accounts Entra ID (f.k.a Azure AD) B2B accounts that you don’t want to make eligible for elevating to the privileged group without someone from your organization or project team for to approve the elevation and then you could give your internal project developers group different settings that do not need any approval to activate the assignment to these privileges, no worries I will deep dive into how to configure this down below.
So let’s start, when creating an Entra ID (f.k.a Azure AD) Group that needs to be able to have Roles assigned to it or enabled for privileged access you need to create the group from scratch, it’s not possible to change an existing Entra ID (f.k.a Azure AD) group to Role Assignable Azure AD group for security reasons such as accidentally giving a large group of people/workloads possibility for higher privileged roles, you also need to have necessary permissions like Global Administrator or Privileged Role Administrator and an Entra ID (f.k.a Azure AD) Premium P2 Licenses.
When creating the group with IaC using Terraform Entra ID (f.k.a AzureAD) Provider or Azure CLI and authenticating with a Workload Identity (Service Principal or Managed Identity) you need to give that workload identity the following MS Graph API Permissions Application Role “RoleManagement.ReadWrite.Directory” or “Directory.ReadWrite.All” but be very careful with these permissions as they are practically a Global Administrator / Privileged Role Administrator and make sure you protect those workload identities and even utilize the new public preview of Conditional Access for workload identities (Terraform Resource: Entra ID (f.k.a AzureAD) Group) | (Configure Conditional Access for workload identities)
So with all that in place, the first step is to create a new Entra ID (f.k.a Azure AD) group by going into Azure Active Directory > Groups > New Group.
"Remember as I mentioned earlier it has to be a new group, it's not possible to modify the existing group to be Entra ID (f.k.a Azure AD) Privileged Group."
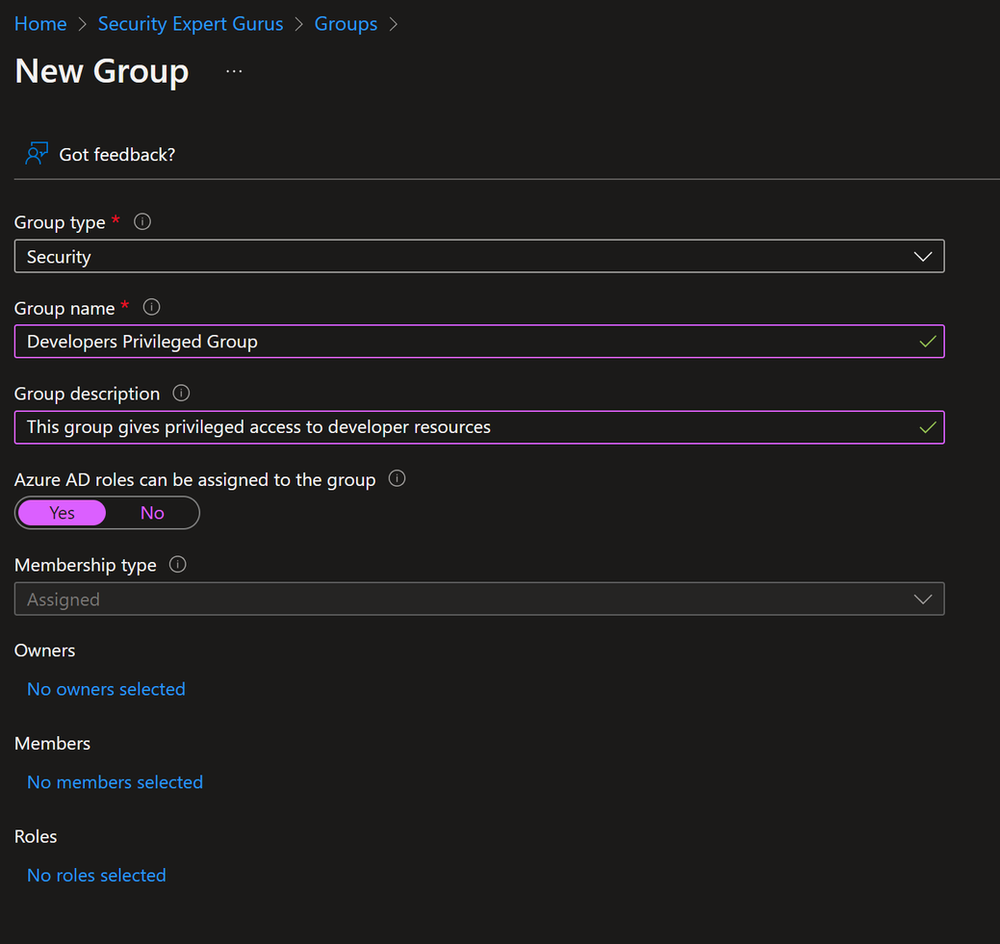
Fill in the required information like Group Type, Group Name, and Group Description following the naming standard and requirements that your environment requires.
When you toggle the “Entra ID (f.k.a Azure AD) roles can be assigned to the group” to Yes you can see that a new field appears on the bottom of the page with Roles, there you can select Entra ID (f.k.a Azure AD) Roles before you click on Create, but in this scenario, we are not going to do that as we will assign this group eligibility to roles in later steps, click create and accept the warning.

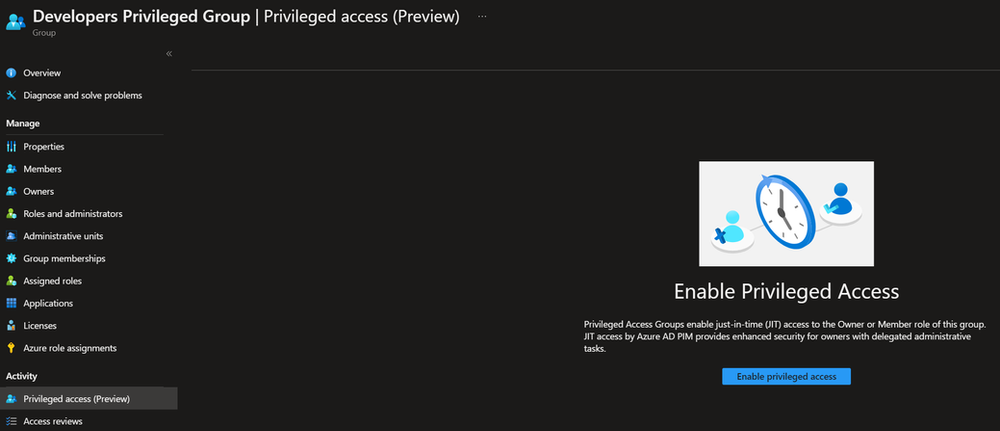
Now you have a group that is Role Assignable, the next step is to click on the group and navigate to Privileged Access (Preview) under Activity, and then click on Enable privileged access to onboard the group to Privileged Identity Management (PIM).
Here you can either give individual users or security groups with members eligible assignments to be a member of the privileged access group, but we are not going to do it here so now let’s assign permissions to the Privileged Group, let’s give it owner permission to the Subscription and Key Vault Administrator role to be able to Administrate all data plane actions for Role Based Access Controlled (RBAC) Key Vaults in the subscription as well as Owner Permissions on all resources within the subscription.
Navigate to Privileged Identity Management
For the purpose of this tutorial let’s change the Owner and the Key Vault Administrator Role Assignment to allow Permanent Active assignments, instead of just the default 6 months.
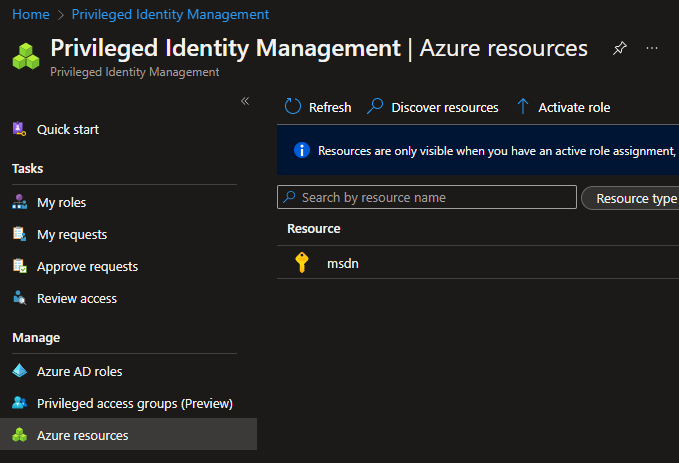
1. Navigate to Privileged Identity Management -> Azure Resources > Choose the Subscription you want to change the roles for (for my scenario It’s the MSDN subscription I want to use.
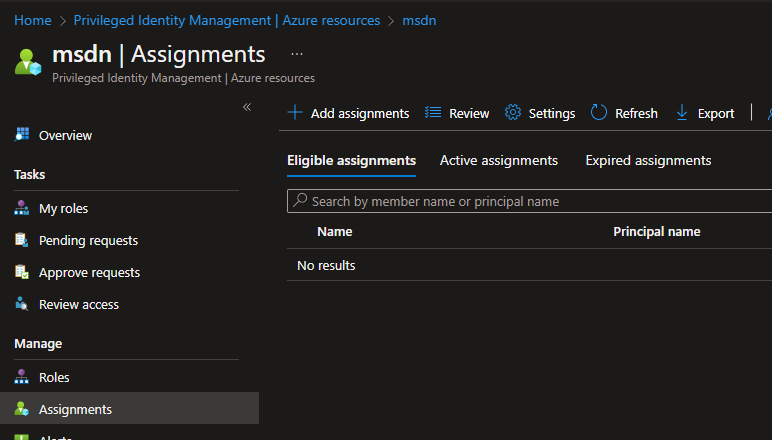
2. Navigate to Assignments and click on Settings
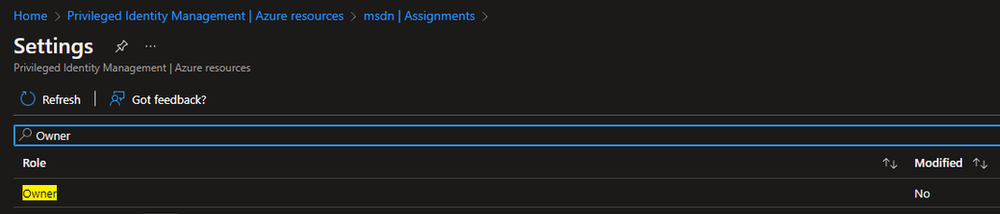
3. Find the “Owner” role.
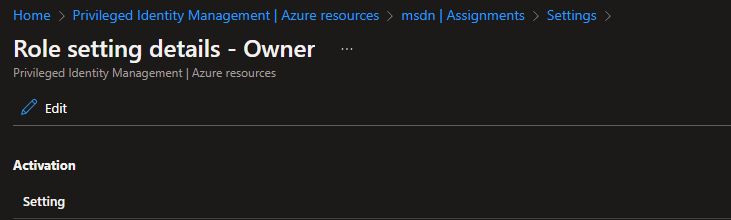
4. Click on it and click Edit
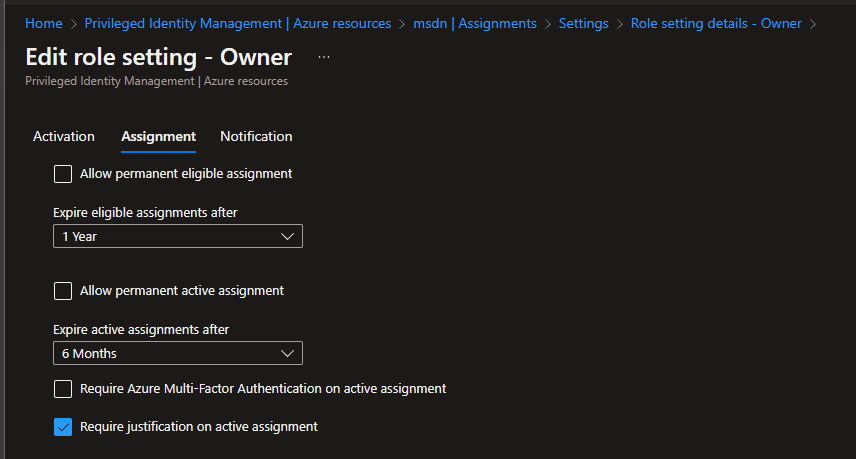
5. Navigate to Assignments (As you can see if the defaults are on, the “Allow permanent active assignment” isn’t checked.
6. Check “Allow permanent active assignment” for this tutorial just go ahead and click on Update, as we are not changing any other settings or notifications now.
7. Repeat steps 3-6 for the “Key Vault Administrator” role.
You should now have the possibility to assign permanent active role assignments for both the Owner Role and the Key Vault Administrator role.
Now let’s create the Assignment after the settings have been applied.
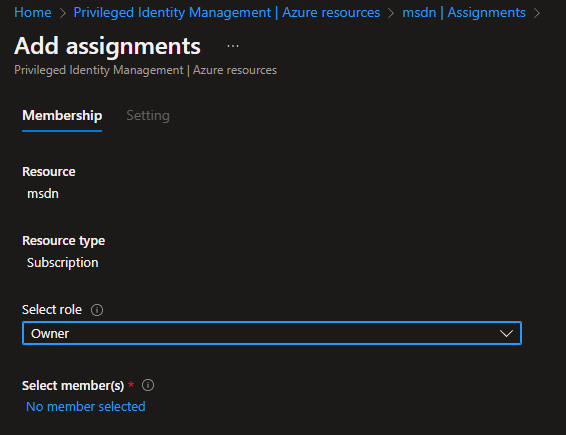
1. Navigate to the Assignments again and click on “+ Add assignment”
2. Select the role you want to assign, and click on “Select member(s)”
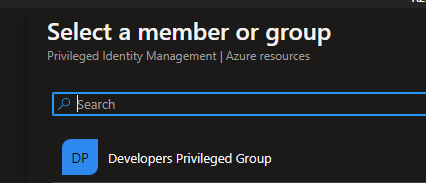
3. Click the group you created earlier and then click select
4. Click Next to go to the Setting pane.n
5. Click on Active in the “Assignment type”
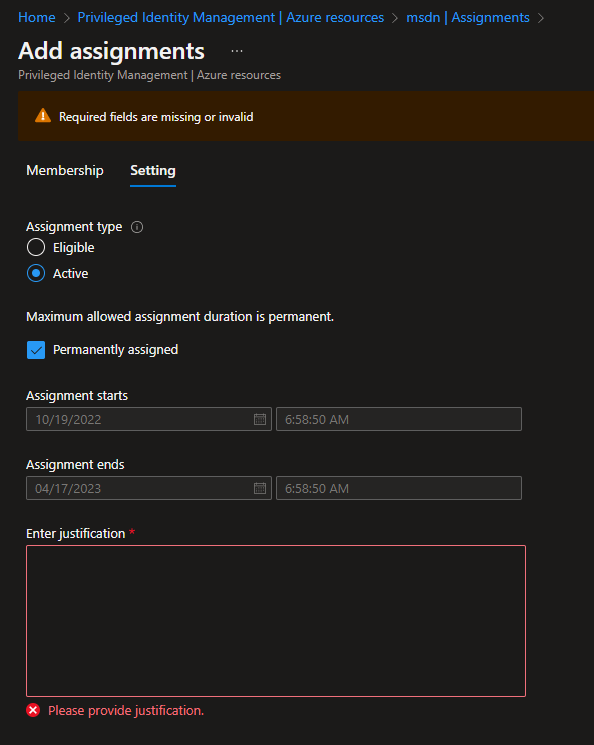
6. In this tutorial, we are doing a Permanent assignment so make sure the Permanently assigned is checked
7. Provide justification, and then click Assign.
8. Repeat steps 1 – 7 for the “Key Vault Administrator” Role.
You should now see that the group is now Assigned to the “Owner” and the “Key Vault Administrator” role and the End time is “Permanent”

Now that you have the Privileged Group in place with the permissions assigned through PIM, it’s time to assign the “Internal Developers” group eligible membership to the Privileged Group
I’ve just created a standard security group called “Internal Developer” for this tutorial and added a test user called “King Harald” as a member of that group, to see how an Entra ID (f.k.a Azure AD) Group is created check How to manage groups – Azure Active Directory – Microsoft Entra)
To Assign eligibility to the Developers Privileged Group you could either use Entra ID (f.k.a Azure AD) and navigate to Groups and then to Privileged access groups (Preview) under Activity or Privileged Identity Manager (PIM), in this tutorial we are going to use PIM for the assignment so.
- Navigate to PIM
- Click on Privileged access groups (Preview) under the Manage section.
Click on the privileged access group that you created earlier, in my case, it’s “Developers Privileged Group”
As you can see there is no Eligible Assignment there under My Roles.
Navigate to Assignments
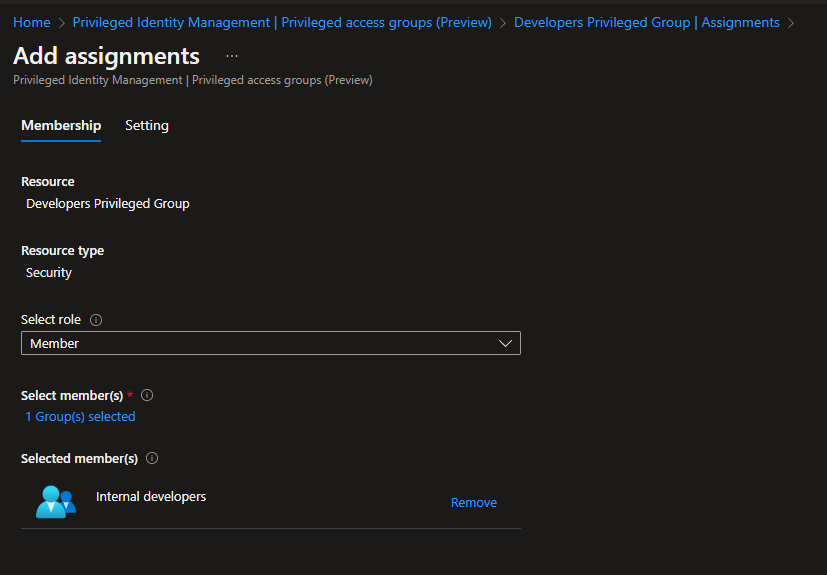
Click on ” + Add assignments”
Select “Member” in the Select Role section.
Then either select yourself or a security group if created earlier, in my case Selected members would be the “Internal developers” group that I’ve already created for this demo.
9. Accept the current default settings for Eligible (which is 1 year)
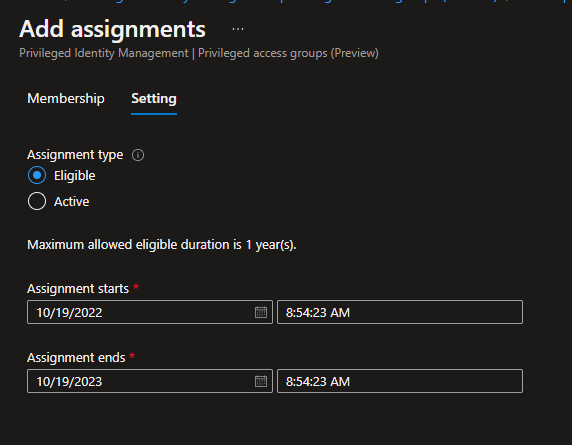
10. Click Assign.
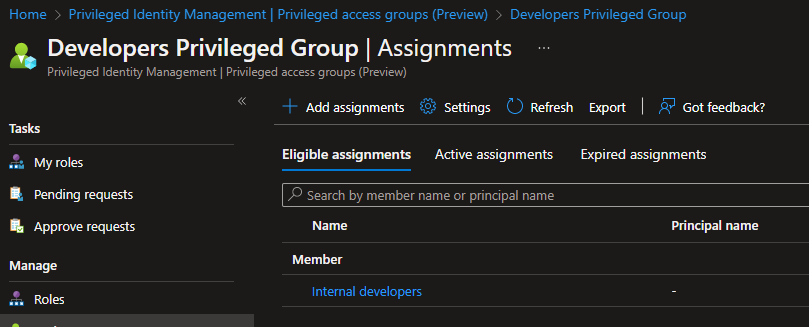
Under Eligible Assignments, you should now see Member – Internal developers / or yourself depending on your setup.
Now the only thing left is to test if this works.
Login to your “Test user” In my case, it’s King Harald if you’ve just added yourself as Eligible you might need to sign out and sign in again to refresh your credential token.
Logged in as yourself or your test user, in my case King Harald, and navigate to PIM (Privileged Identity management)
Click on My roles
Click on Privileged access groups (Preview)
There you should see the Eligible Assignment that you’ve recently created.

5. Click on Activate under Action
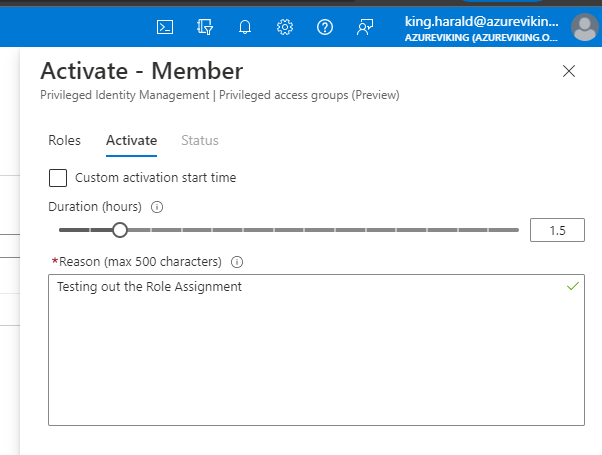
6. There you can customize the duration of the assignment and even activation start time as you please and then provide a reason for activating (Note: I would always recommend activating a role for at least 1 hour as it might take some time for the portal to acknowledge the permissions assignment, even though it mostly takes just a few minutes.)
7. Let’s activate the role for 1.5 hours, provide a reason, and then click Activate.
8. Wait for the Activation to complete and for the browser to refresh the page.
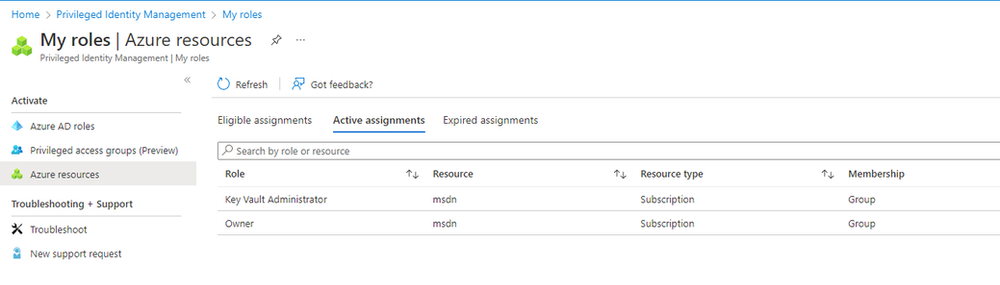
9. After the page has refreshed, within PIM, navigate to Azure Resources under Activate then click on Active Assignments.
10. There you see that the user you are logged in as has now Active Assignment to Key Vault Administrator and the Owner role for the subscription you changed earlier, in my case the MSDN subscription you can also see that the Membership is Group, which means it’s membership within a Privileged Access group.
To test even further, navigate to subscriptions and check your access Subscriptions > “Your Subscription”, in my case msdn > Access control (IAM) > View my access, and as you can see the Role assignments are two as expected and the Group assignment is through the “Developers Privileged Group”

I hope you´ve enjoyed this tutorial, and you´ve learned something, as always feel free to share my post, comment, and give me feedback down below.
Until next time, yours truly Haflidi.
Discover more from Azureviking | Haflidi's Technical Insights
Subscribe to get the latest posts sent to your email.